1
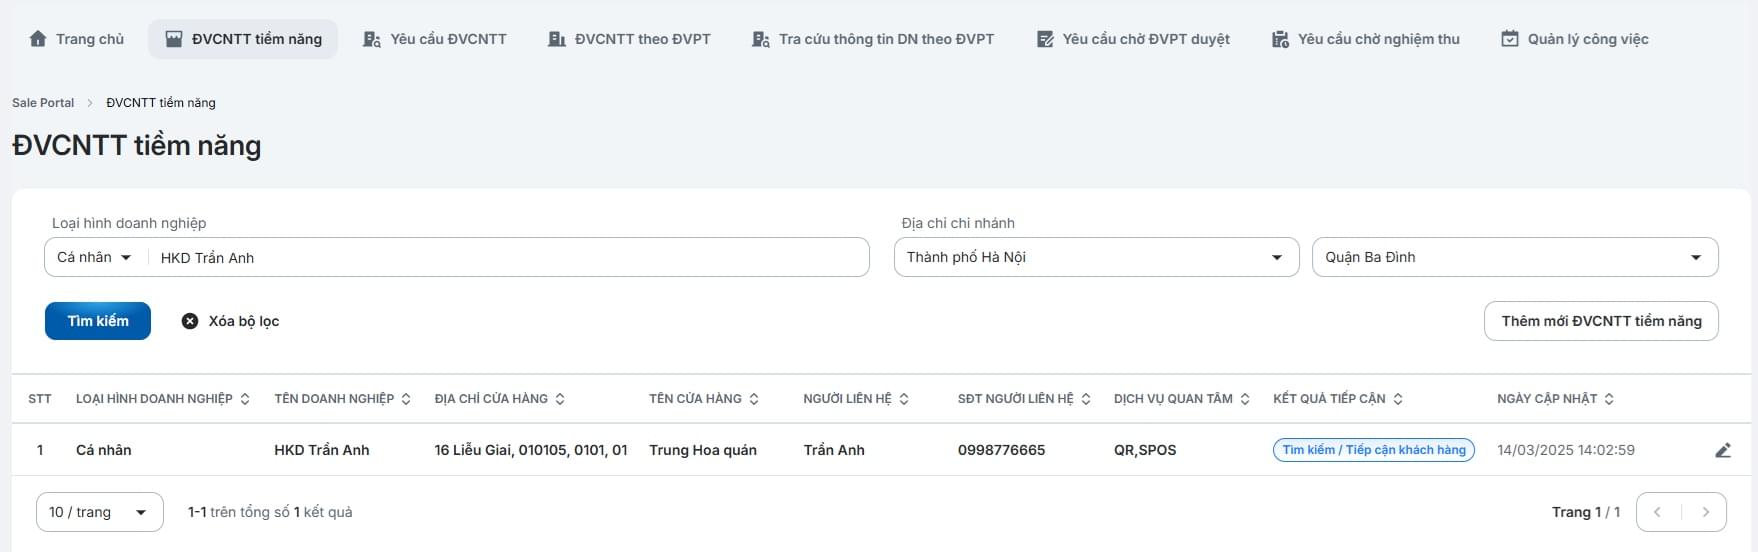
Select "Potential Merchant" on the menu bar.
Select "Potential Merchant" on the menu bar.
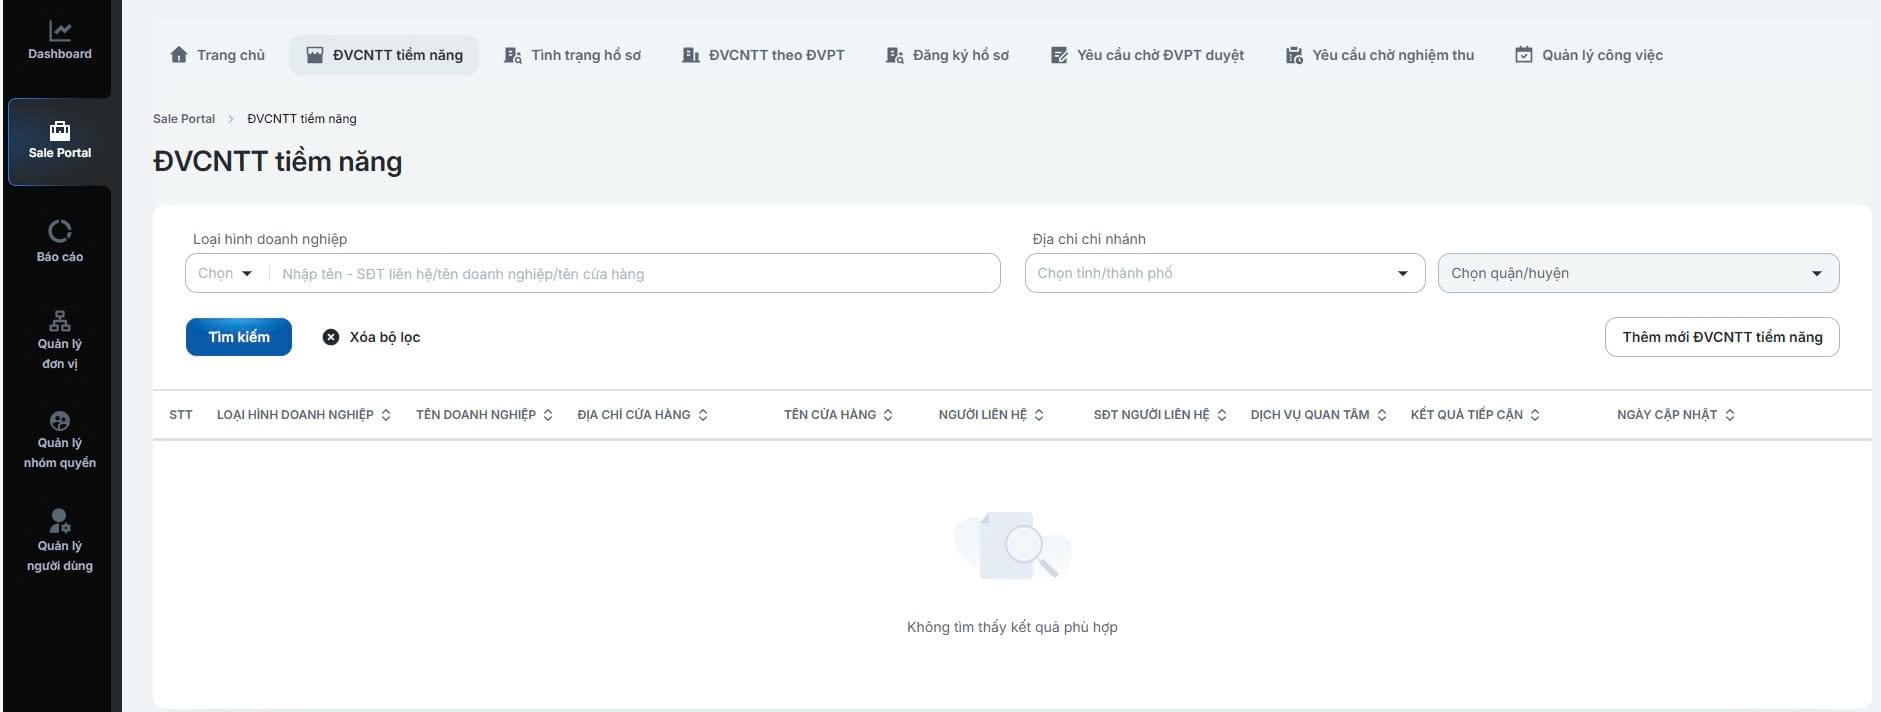
Enter the search criteria and click [Search].
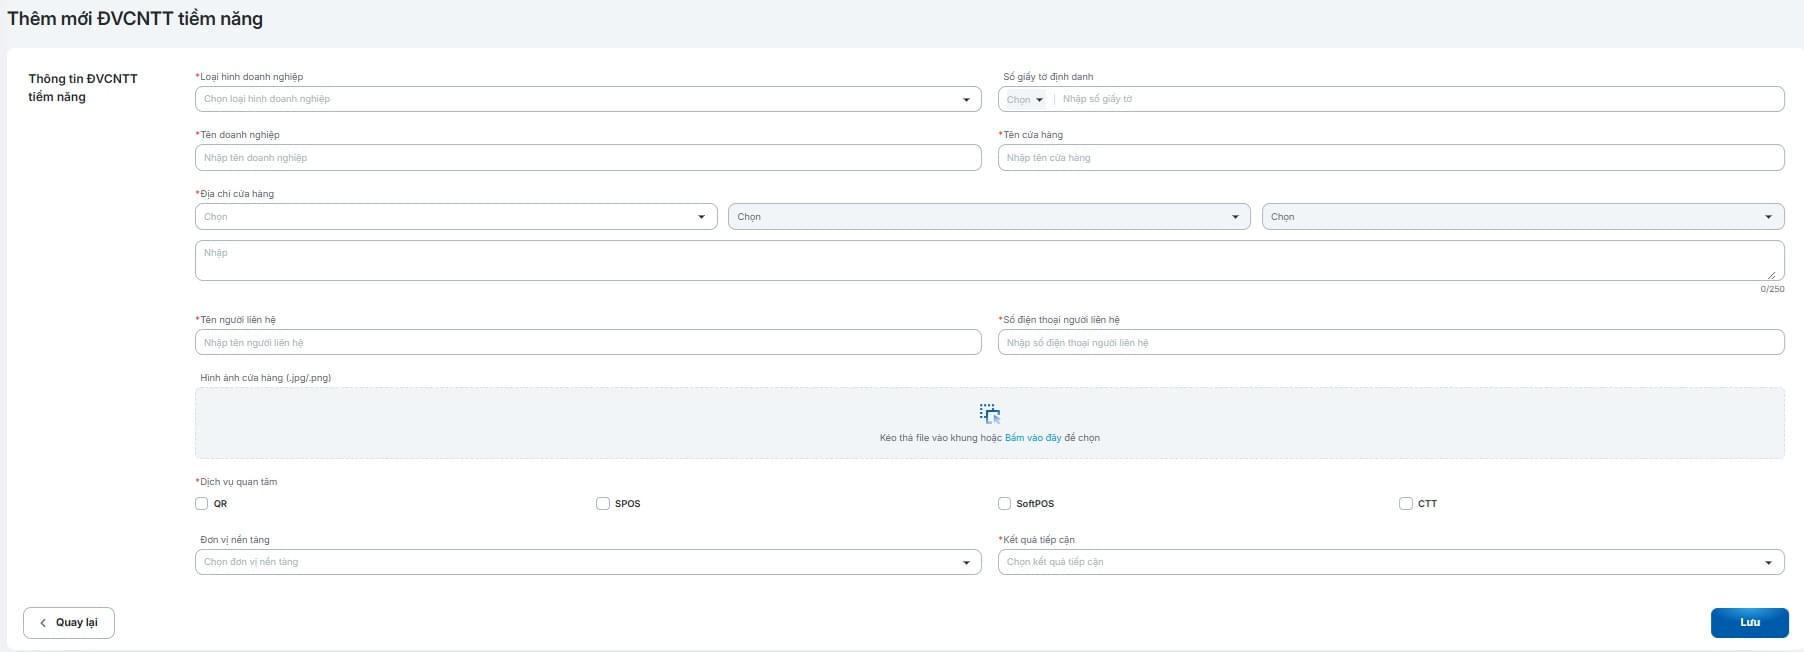
Click [Add New Potential Merchant] to add a new record.
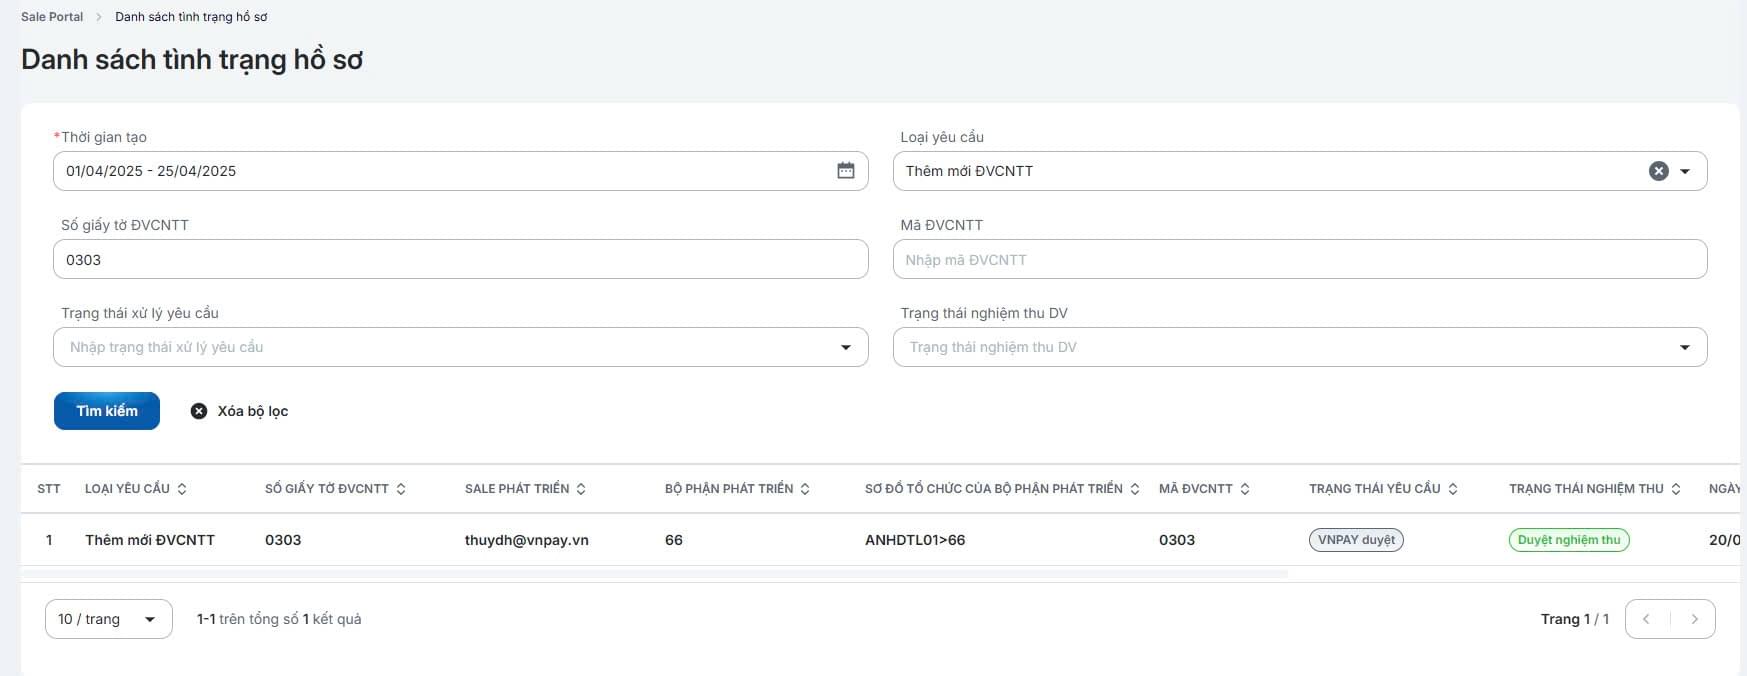
Select "Application Status" on the menu bar
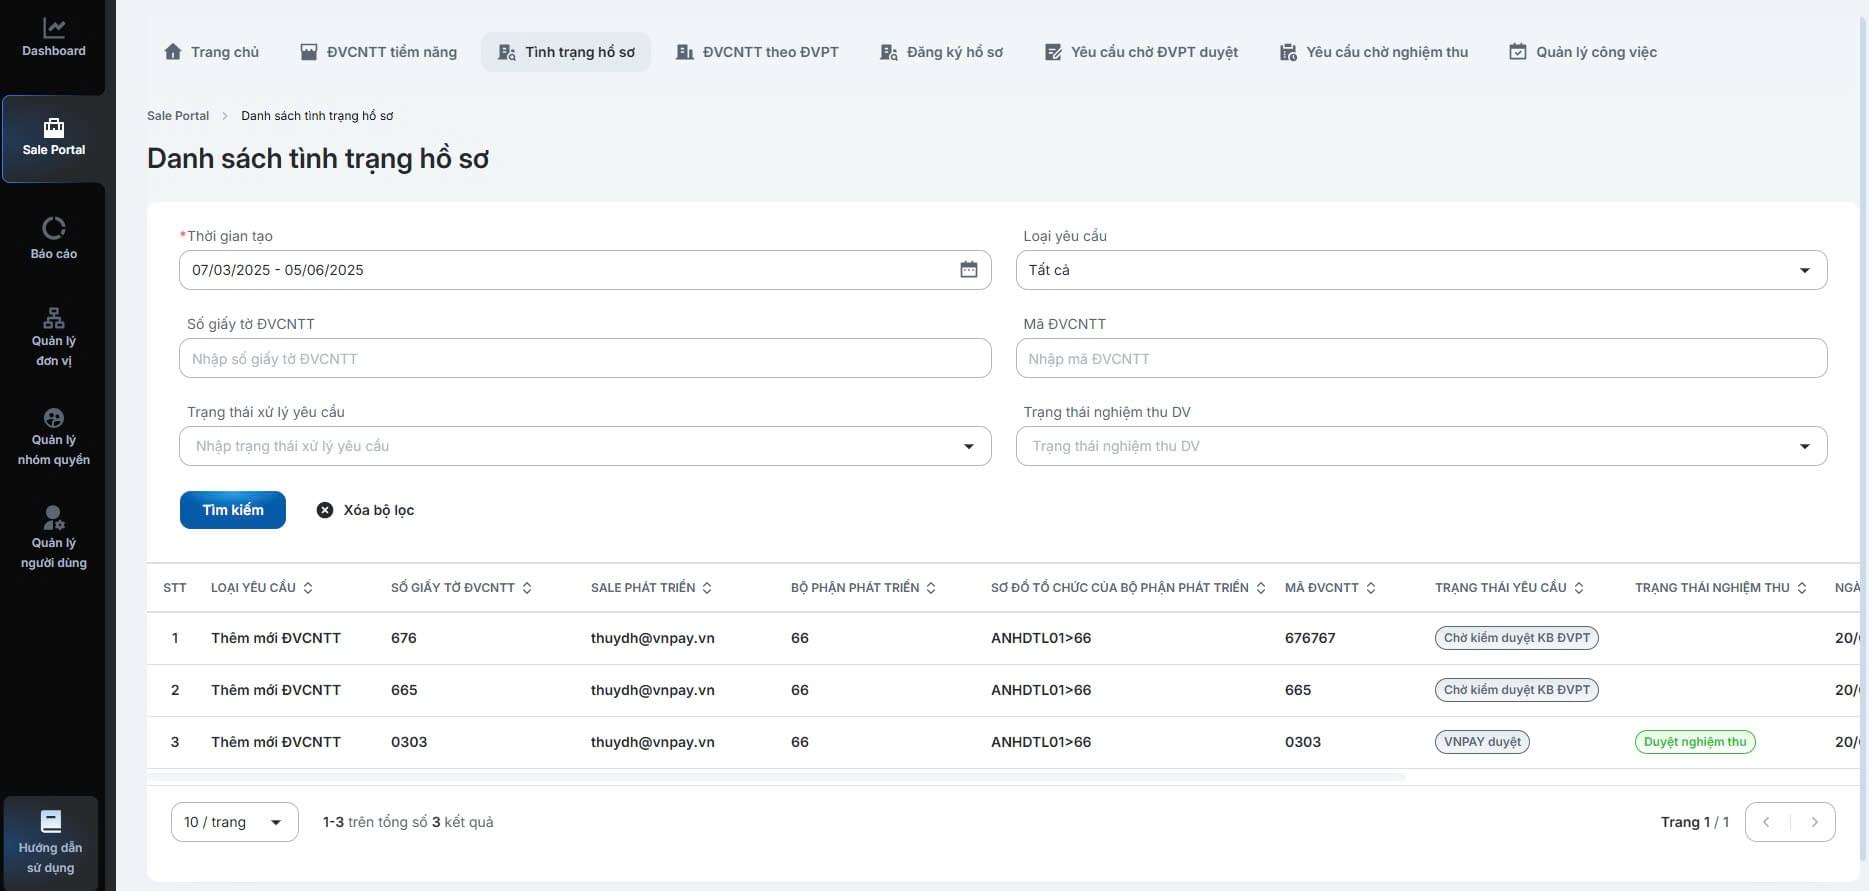
Enter the search criteria and click [Search]
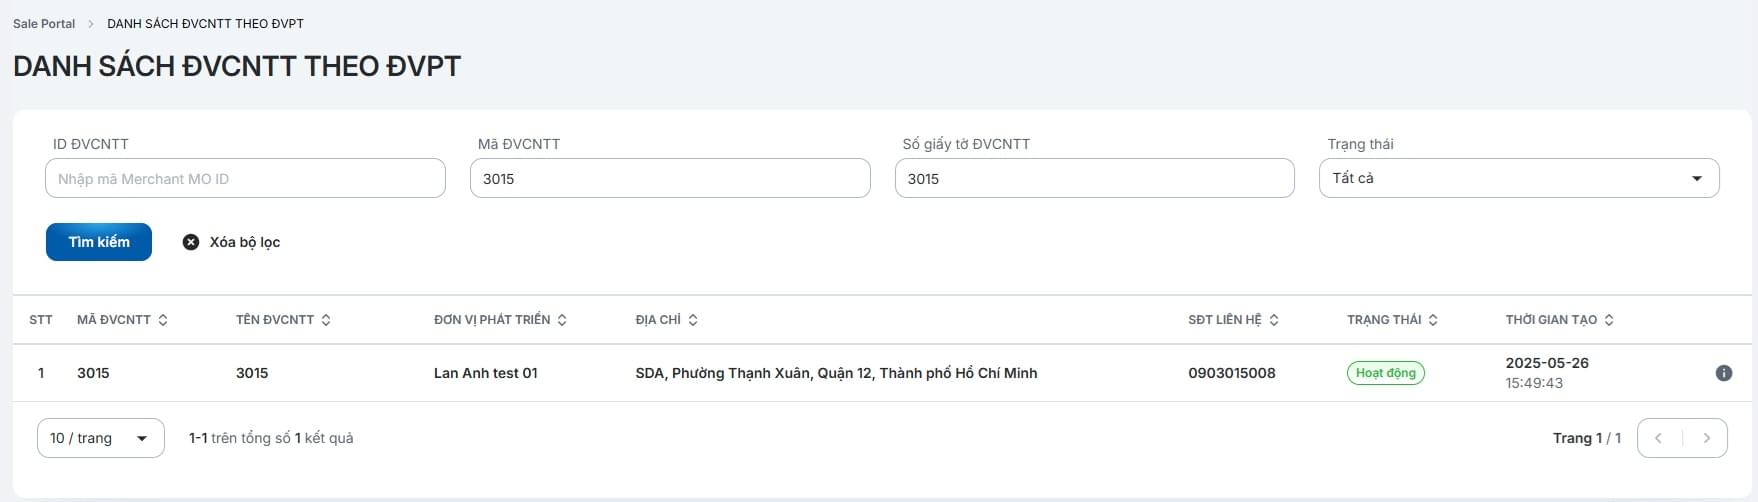
Select "Merchants by Partner" on the menu bar

Enter the search criteria and click [Search]
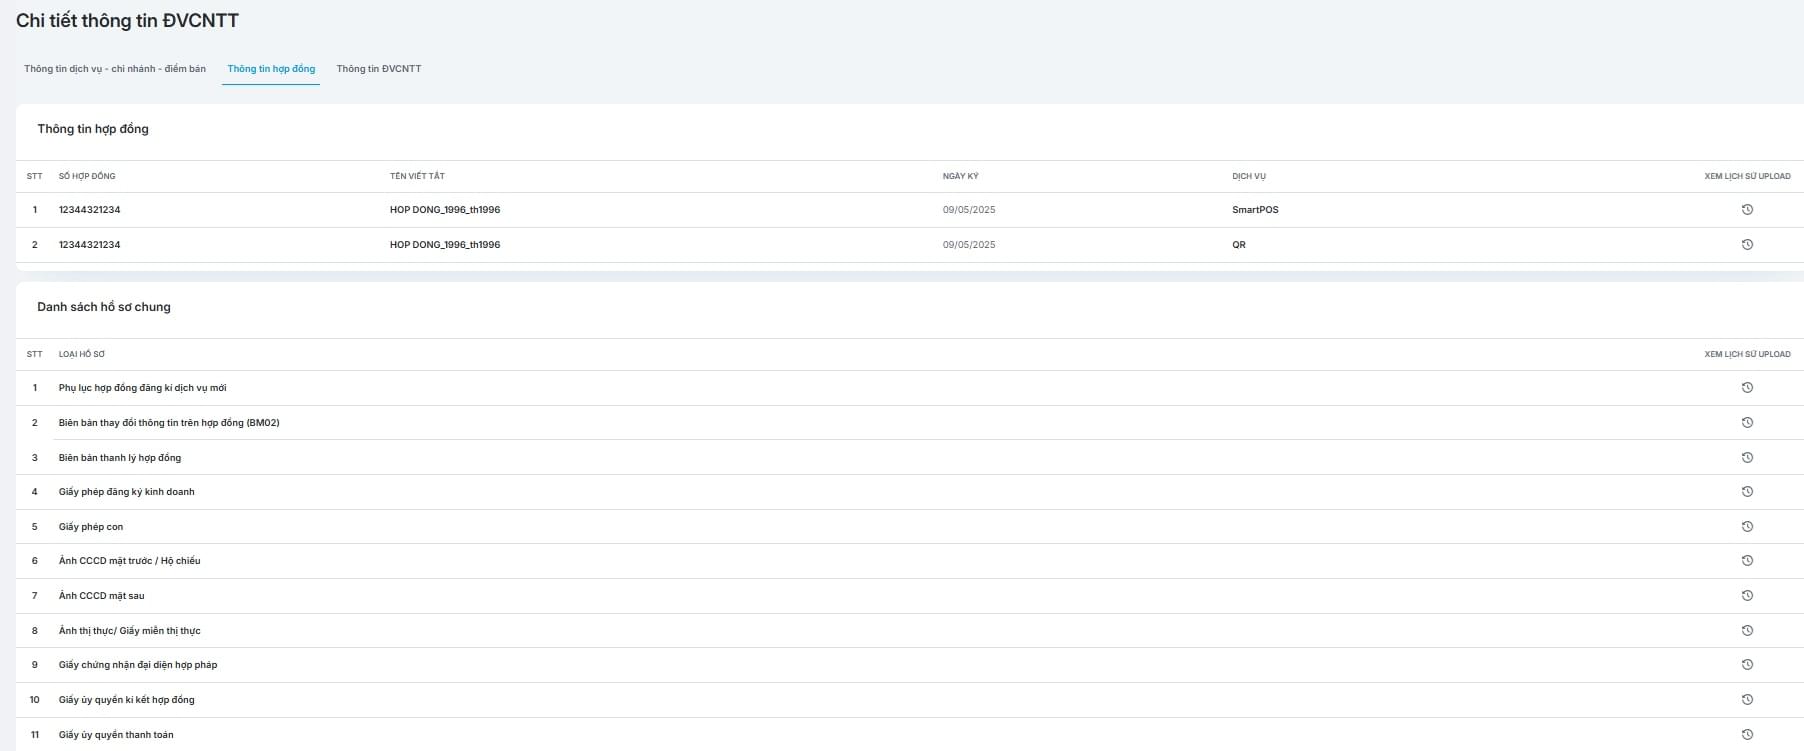
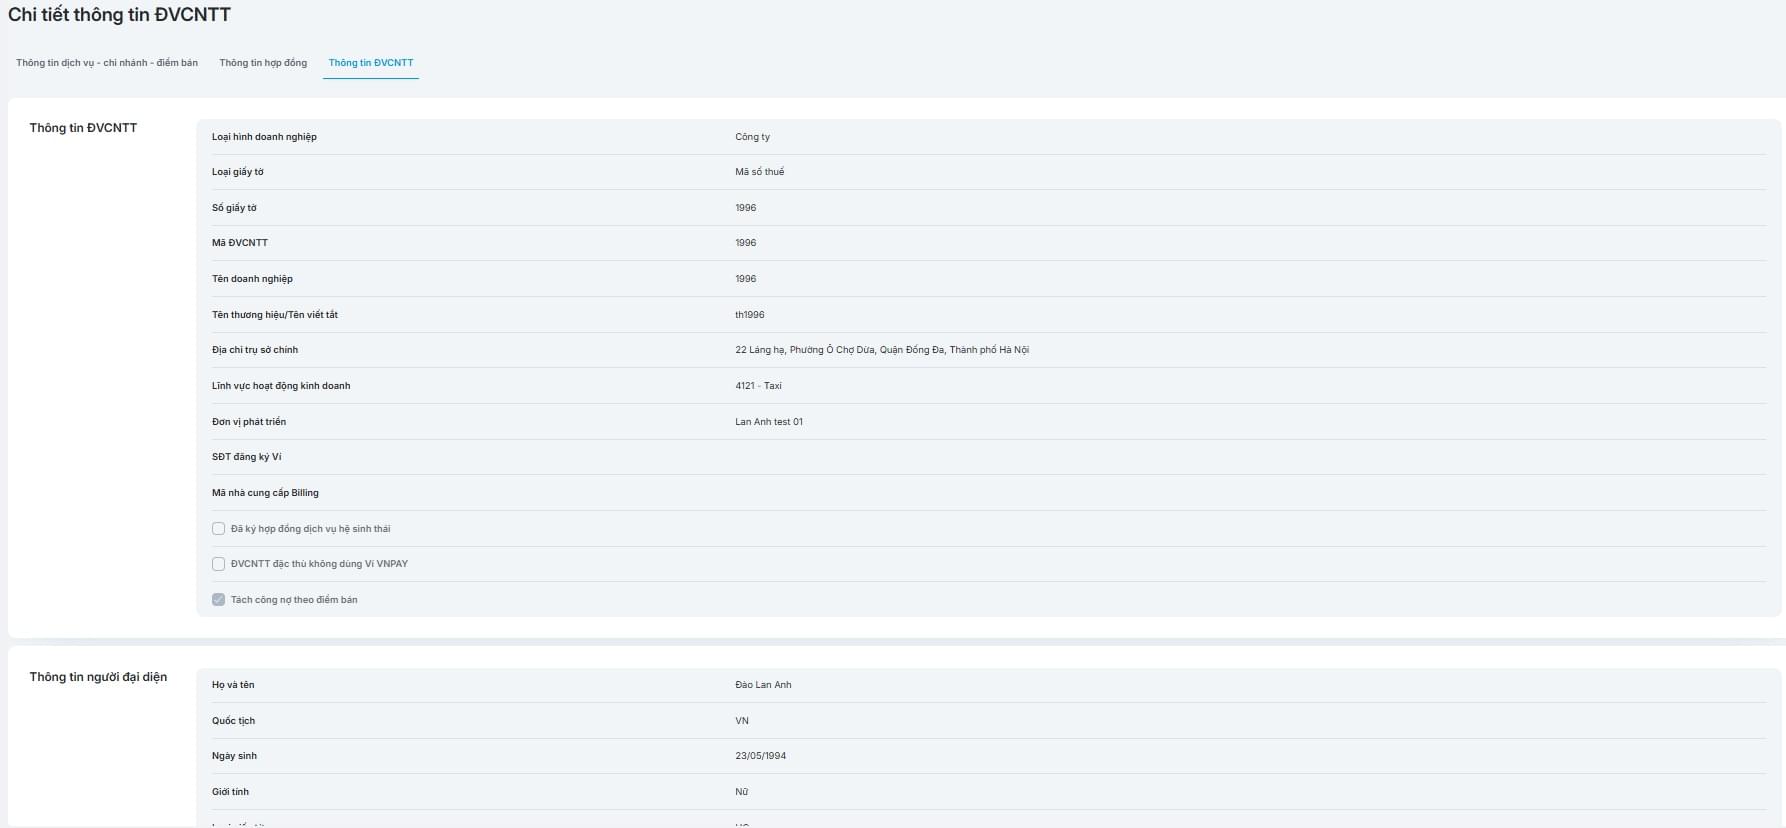
Click the icon  to view merchant details, which include 3 information tabs:

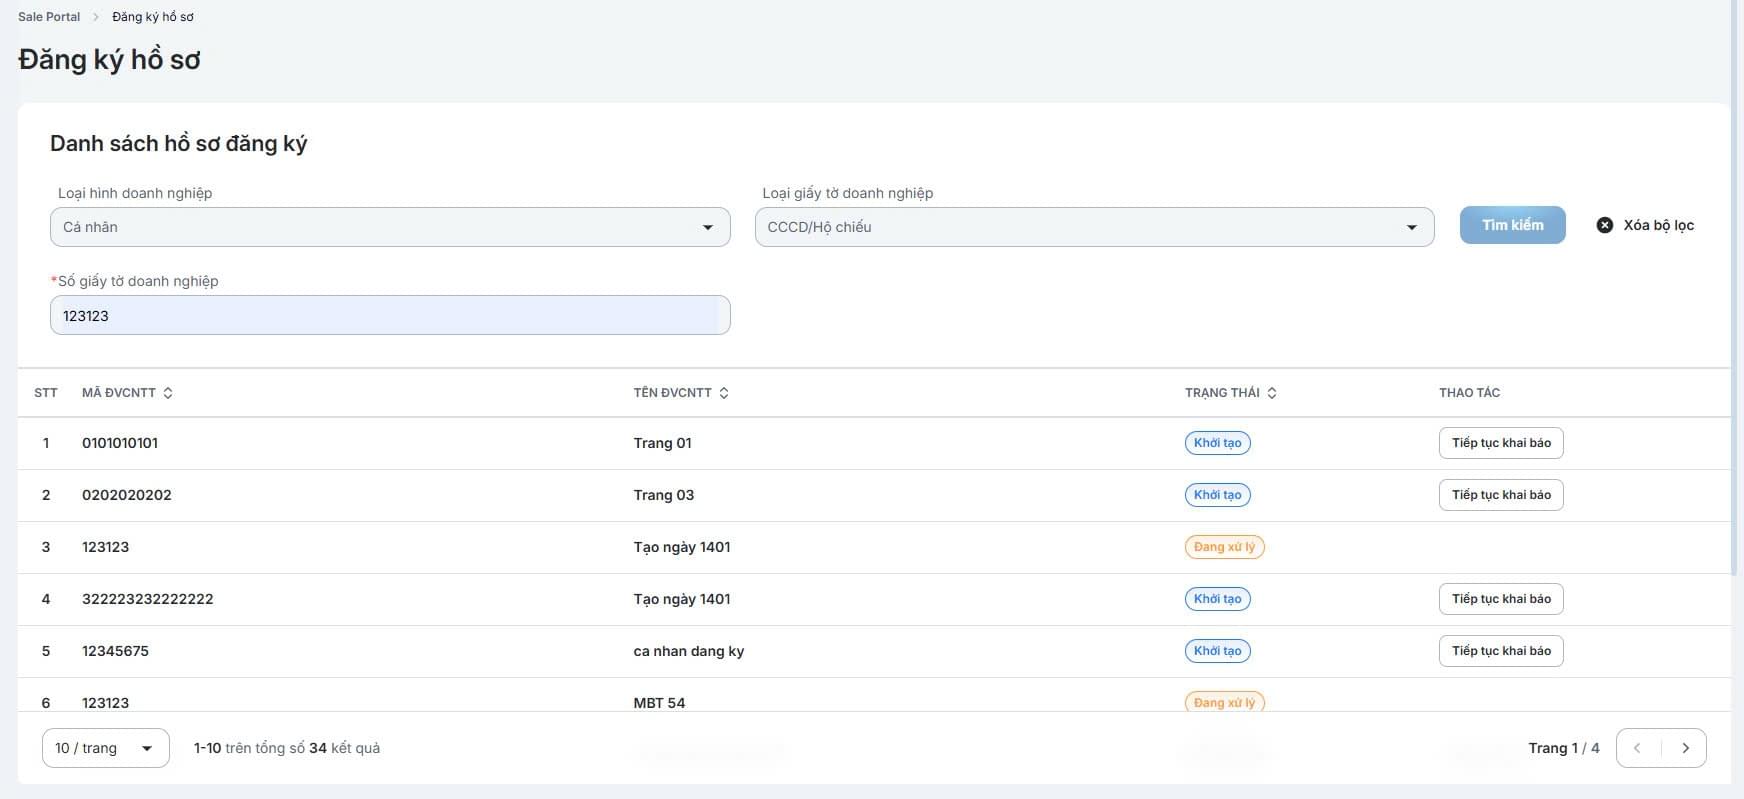
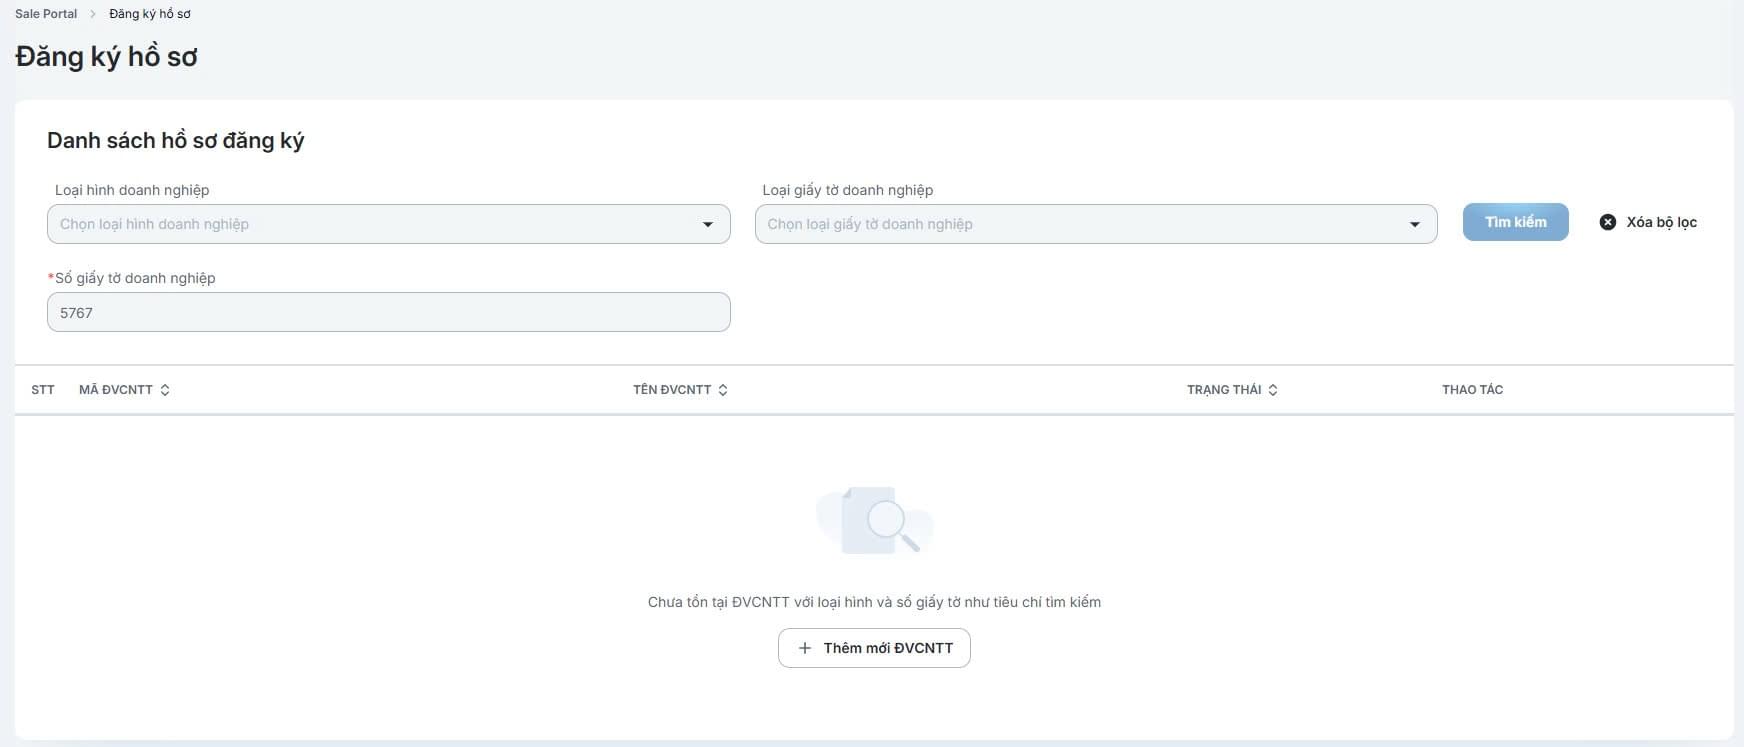
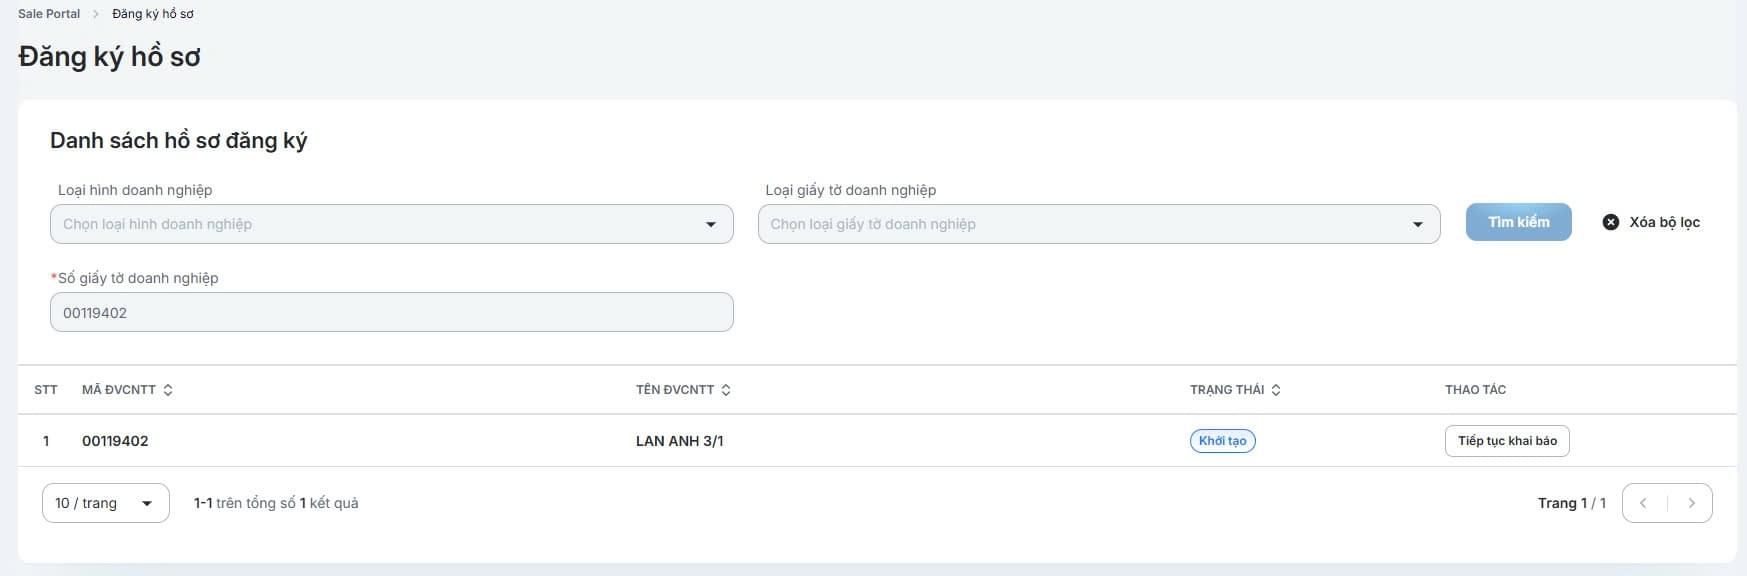
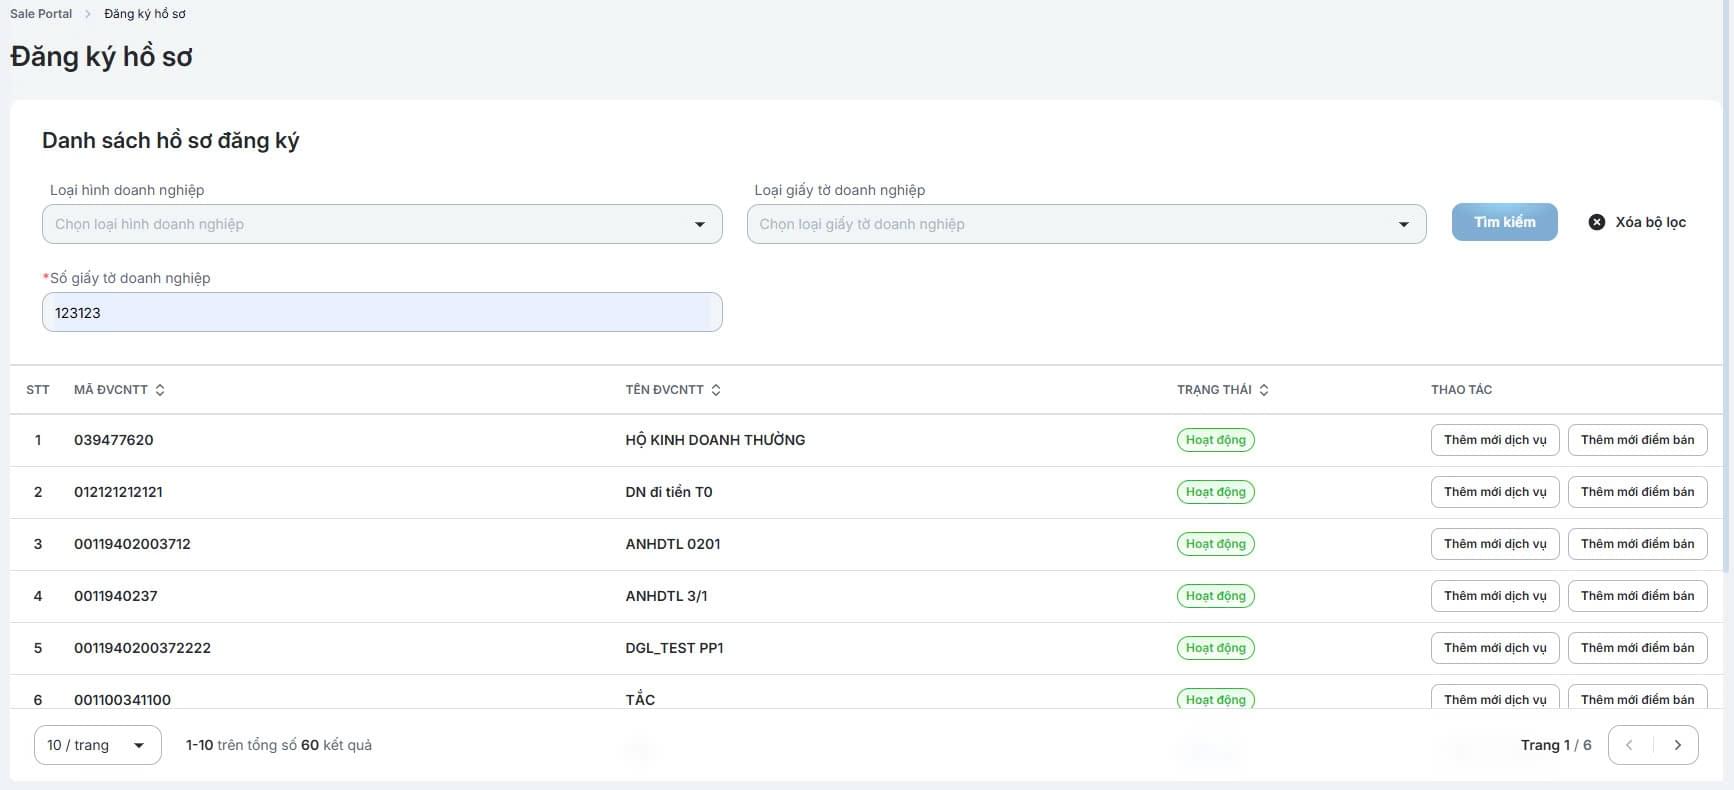
Select "Register Application" on the menu bar
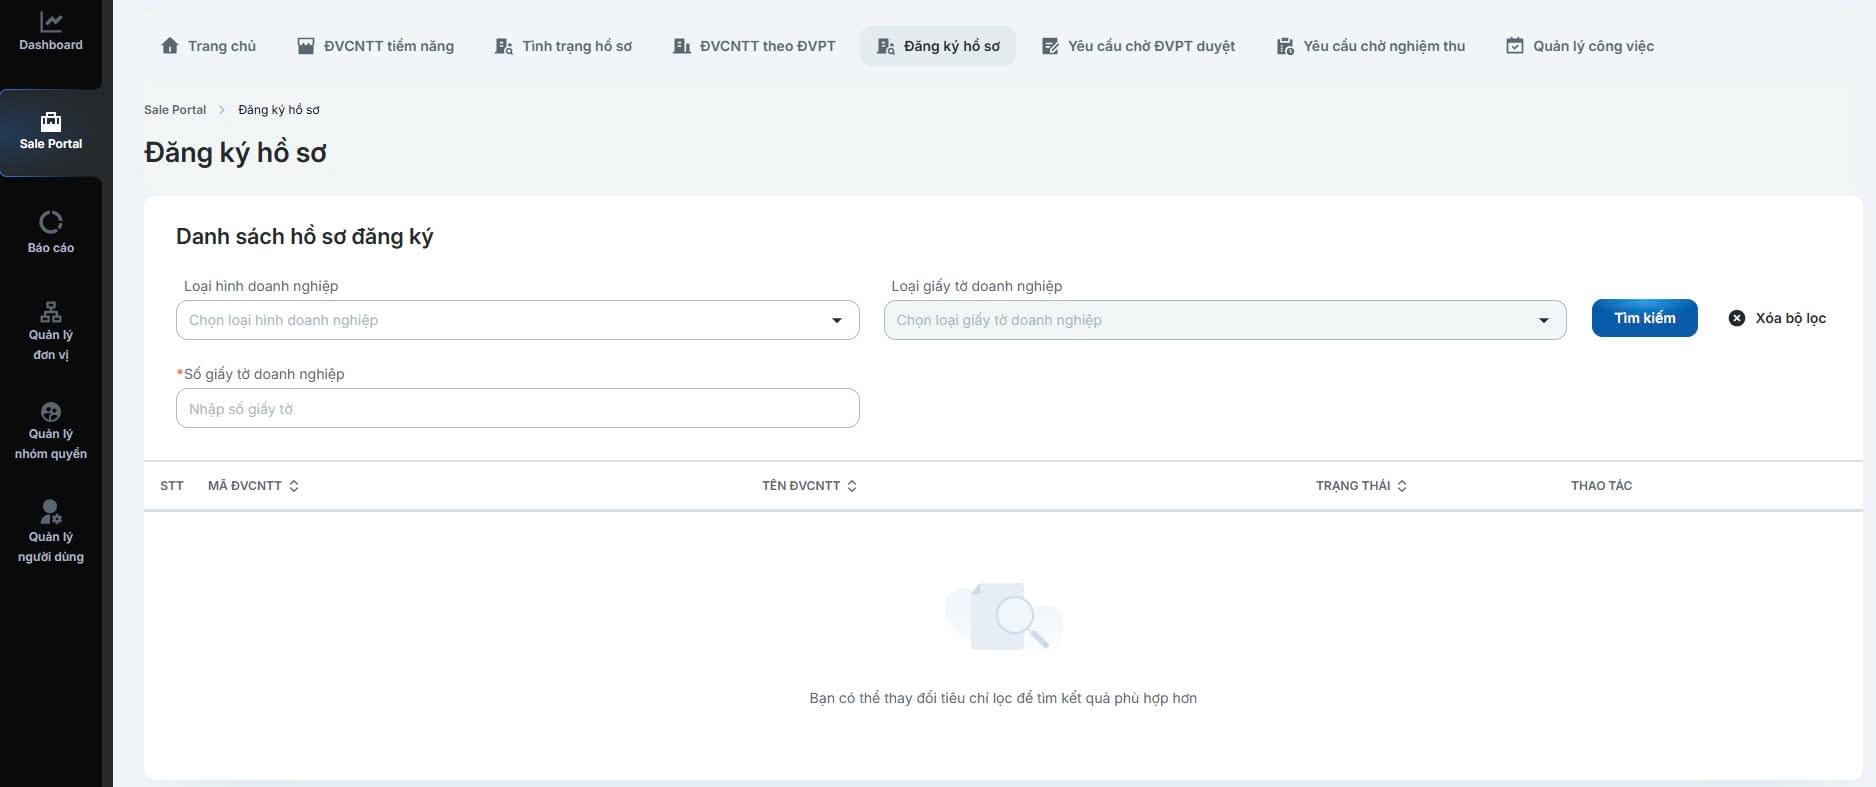
Enter the search criteria and click [Search]
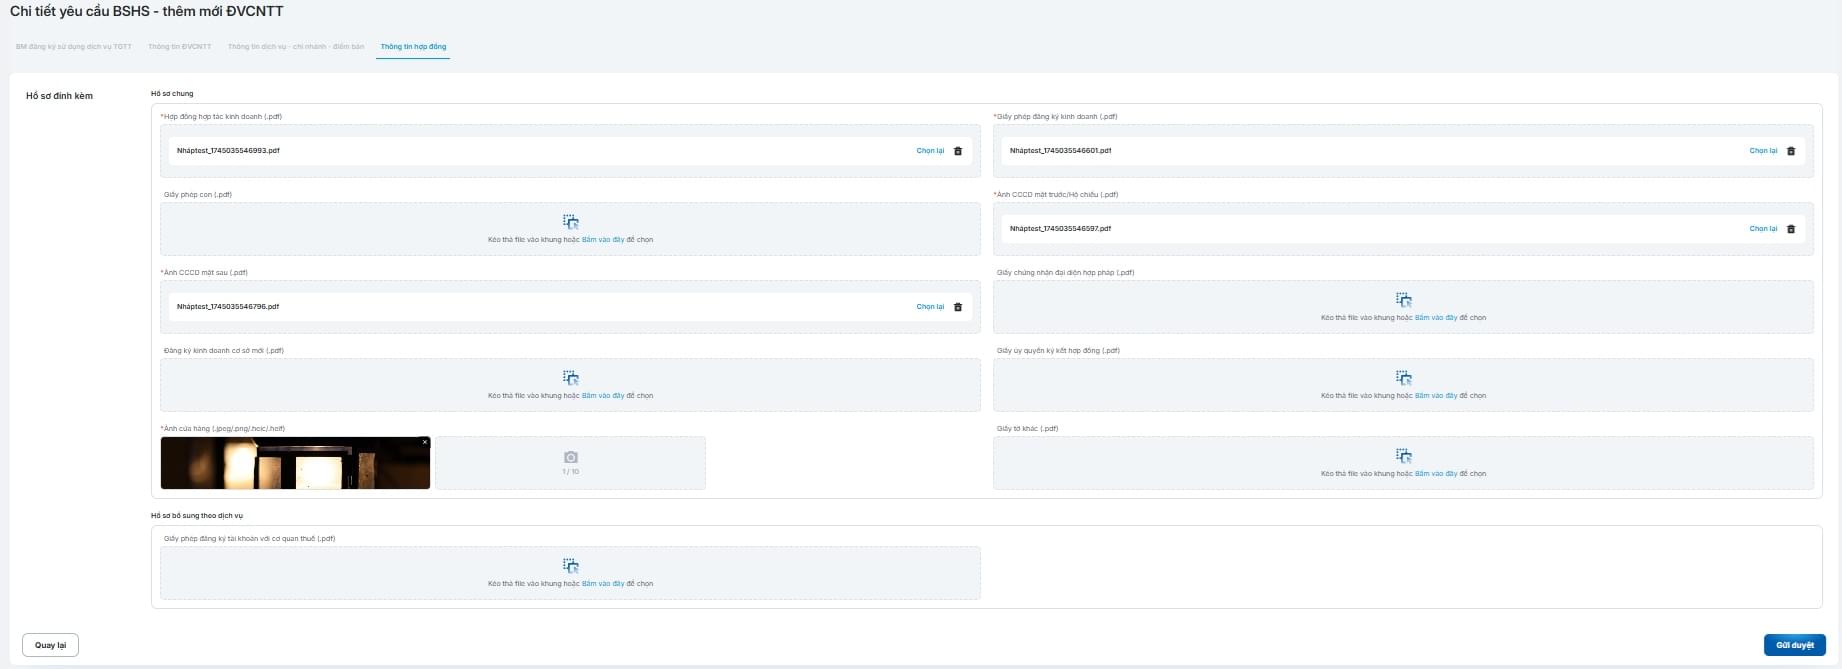
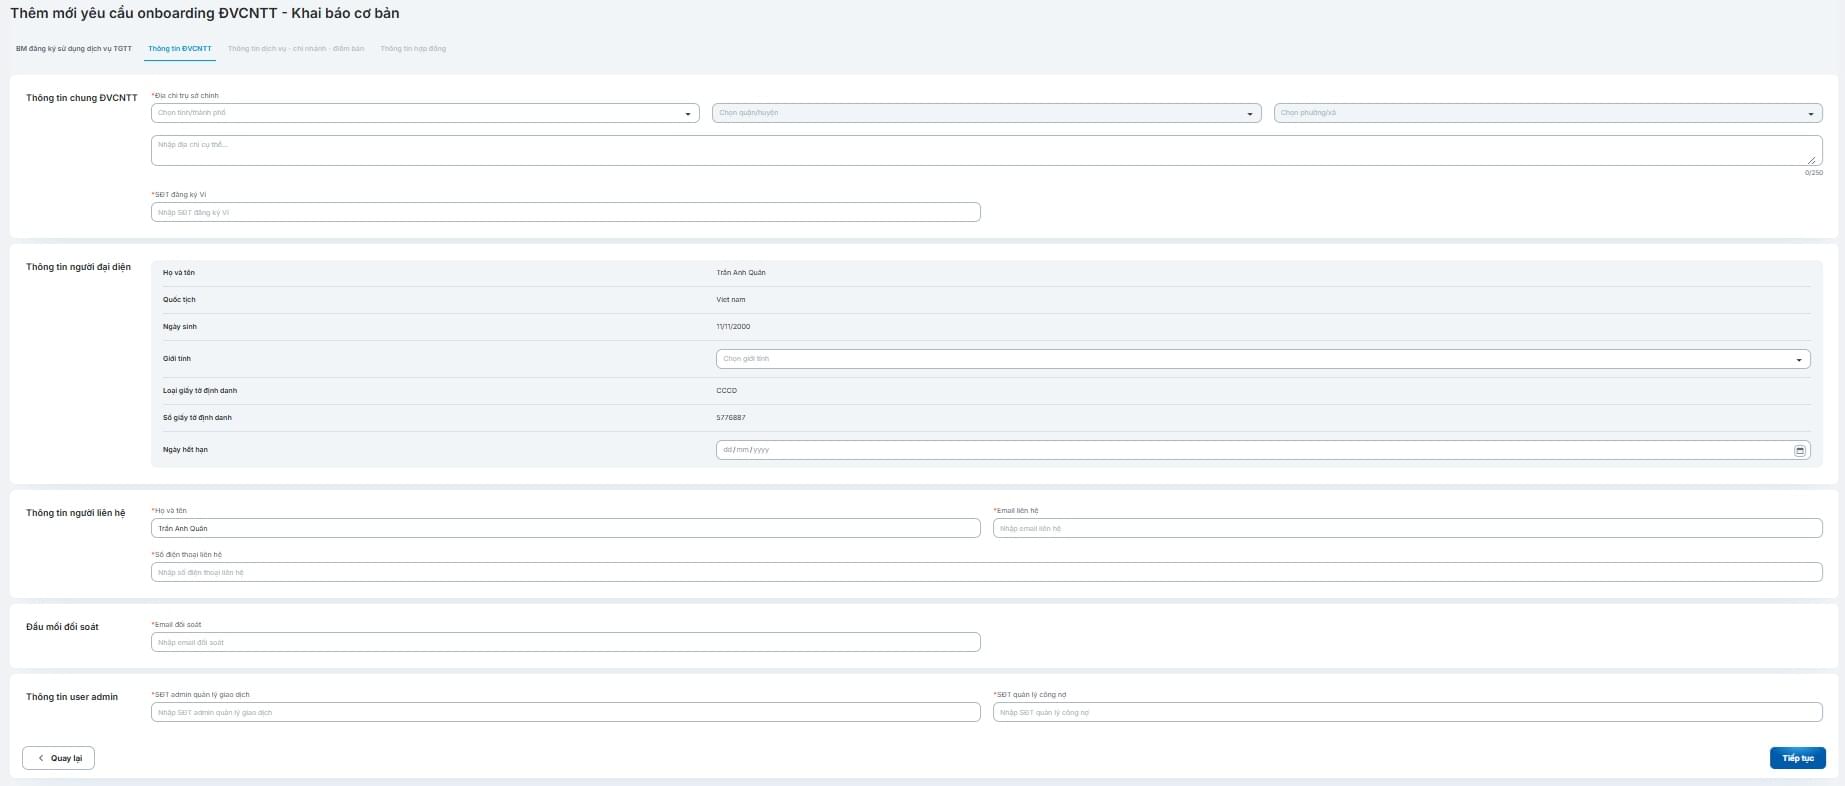
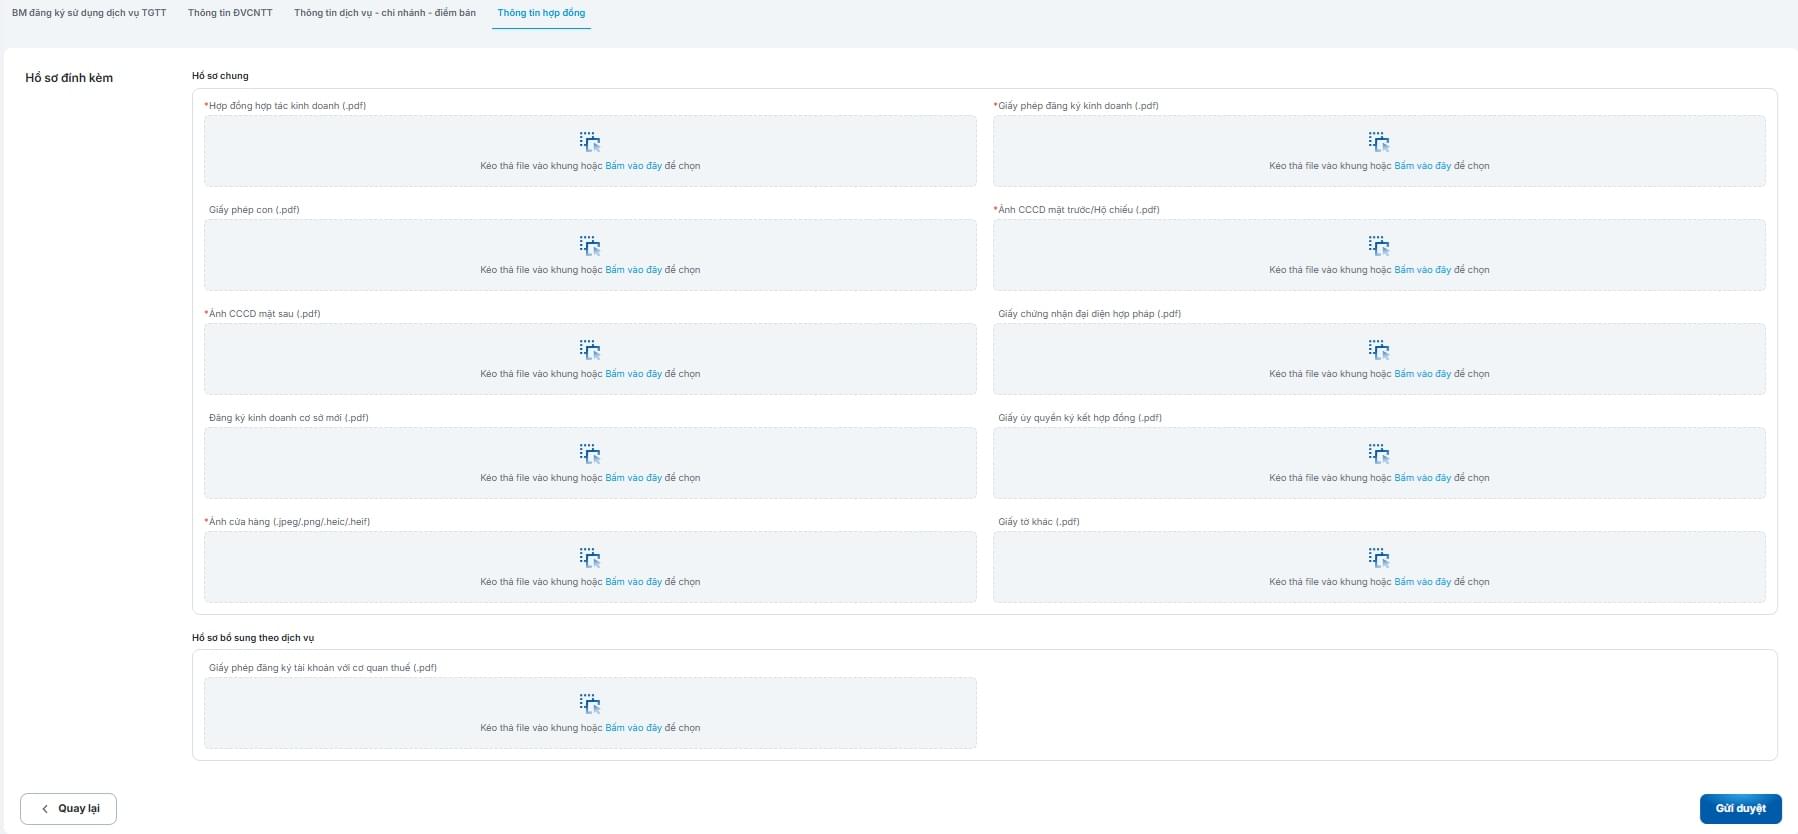
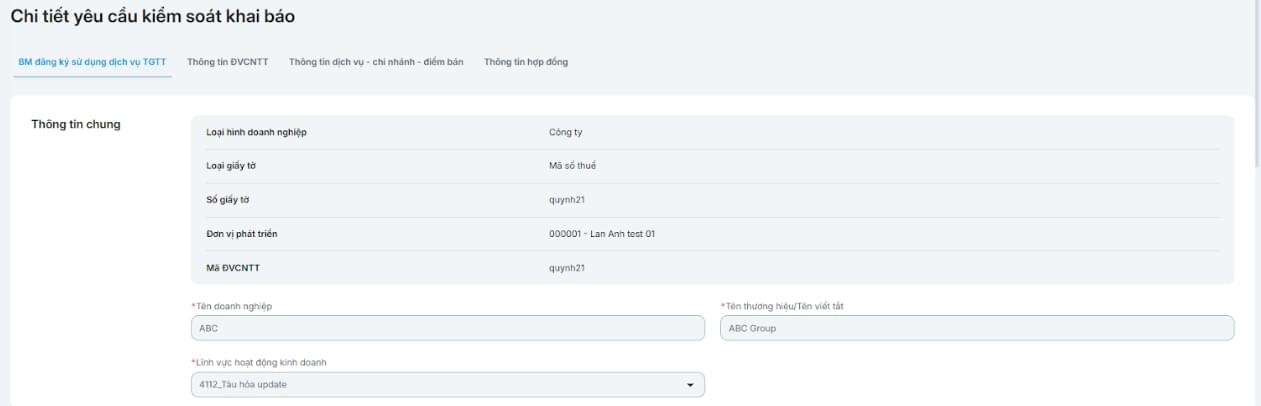
Enter/Select/Upload the required fields in the tabs:
Click "Submit for Approval" to complete adding the new merchant and send the application for review.
After searching the application information and finding that the desired merchant has the active status, select "Add New Service" in the Action column.

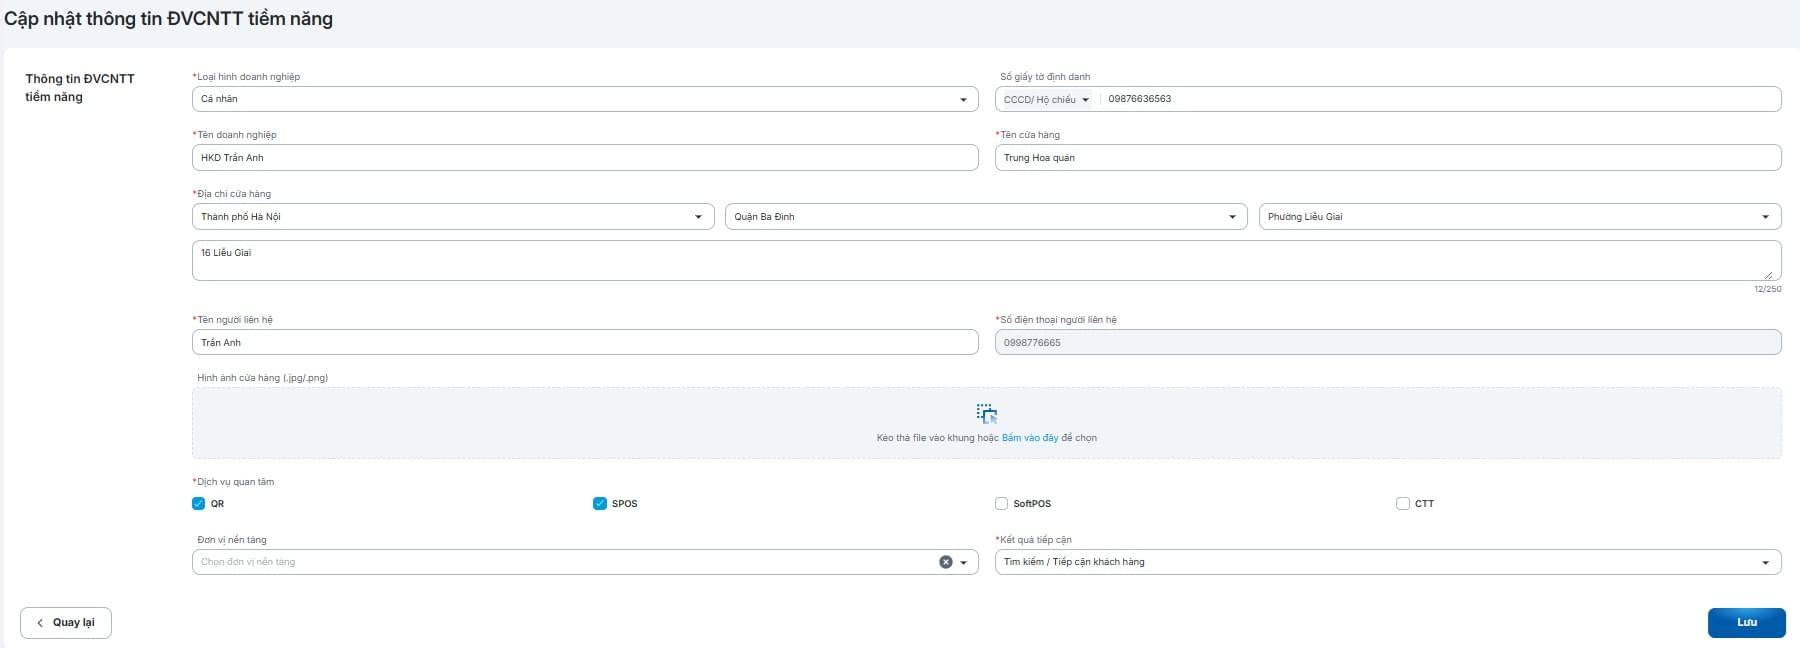
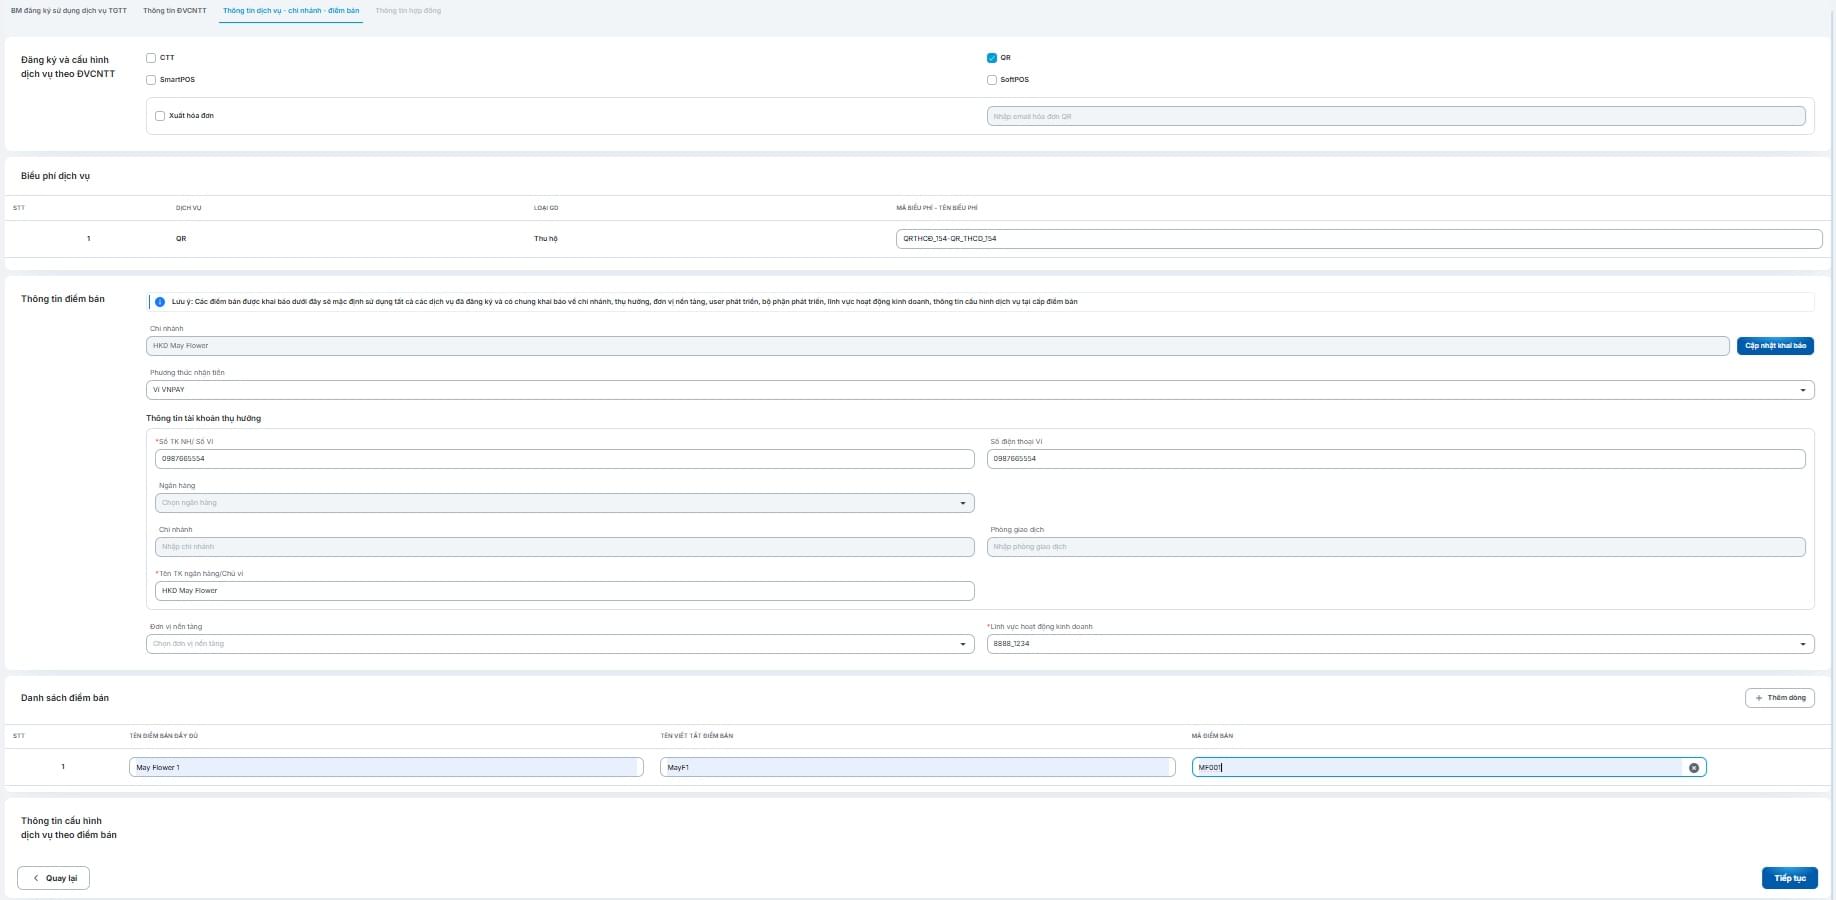
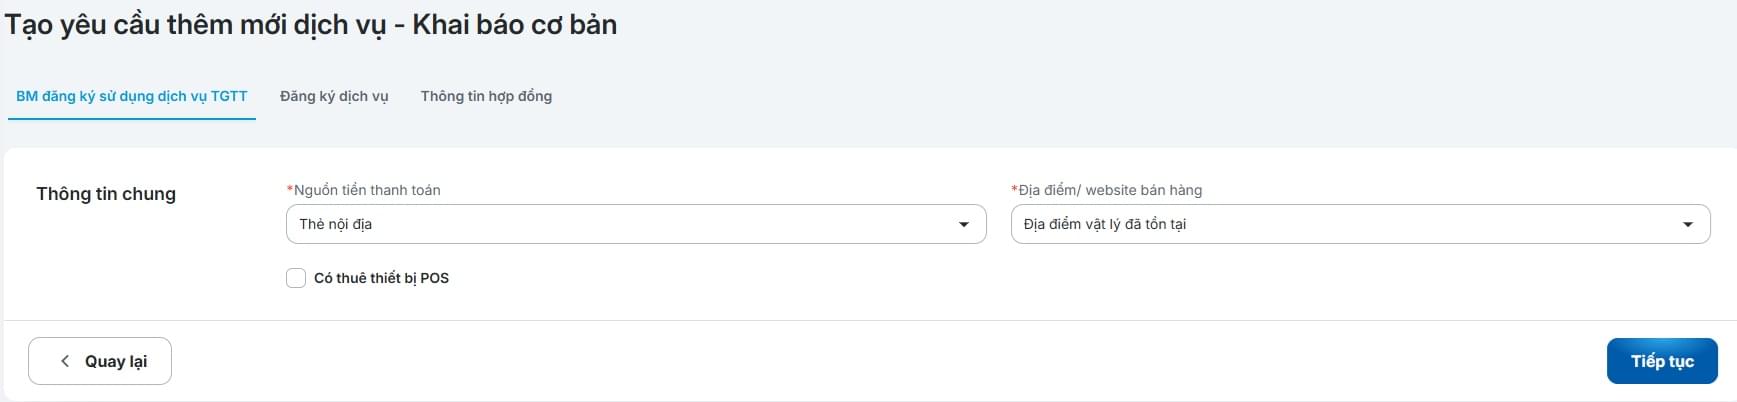
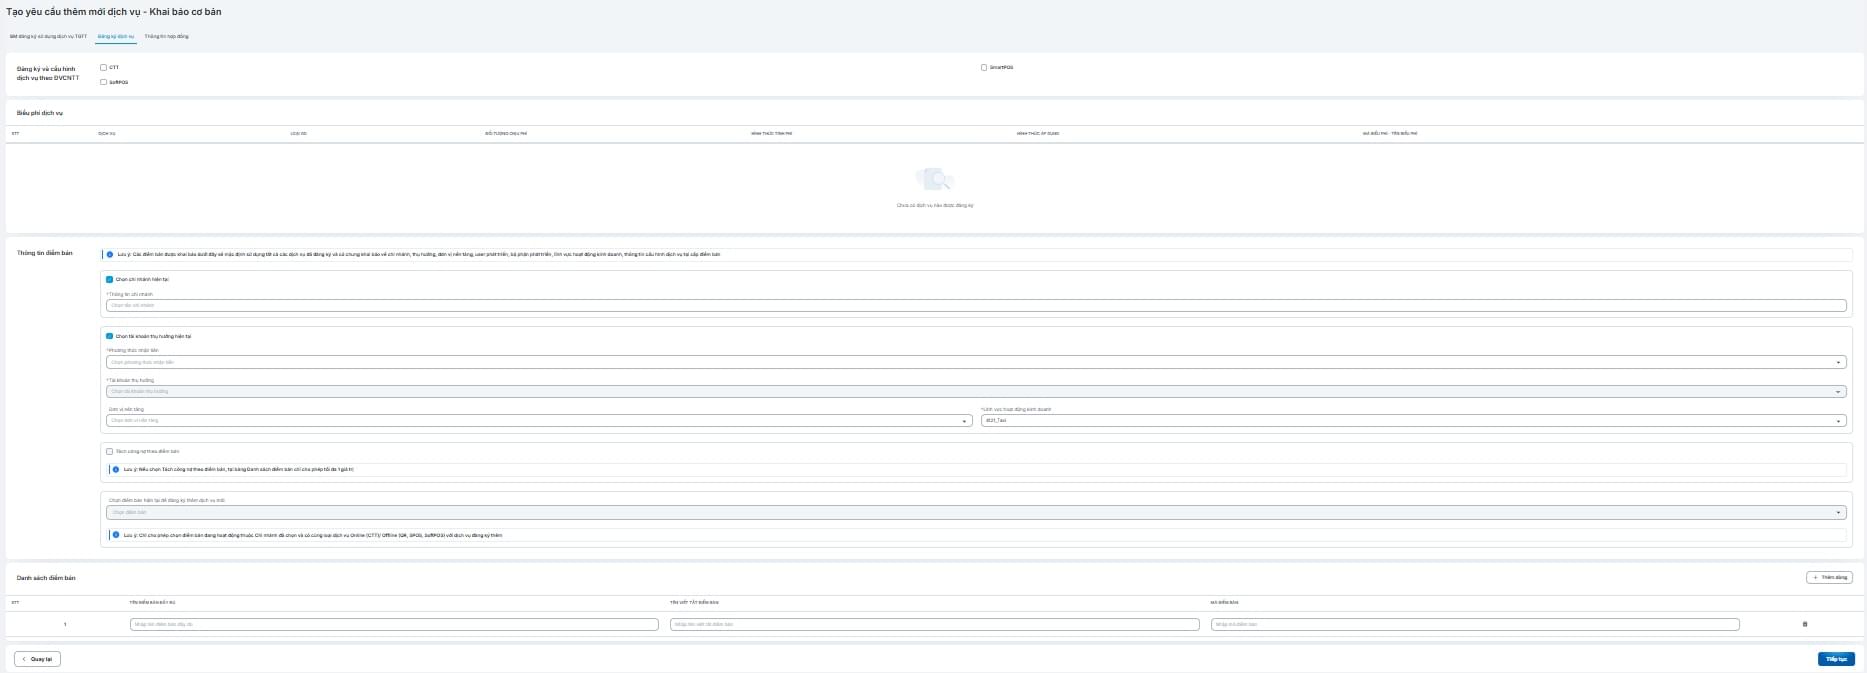
Enter/Select the required fields in the tabs:
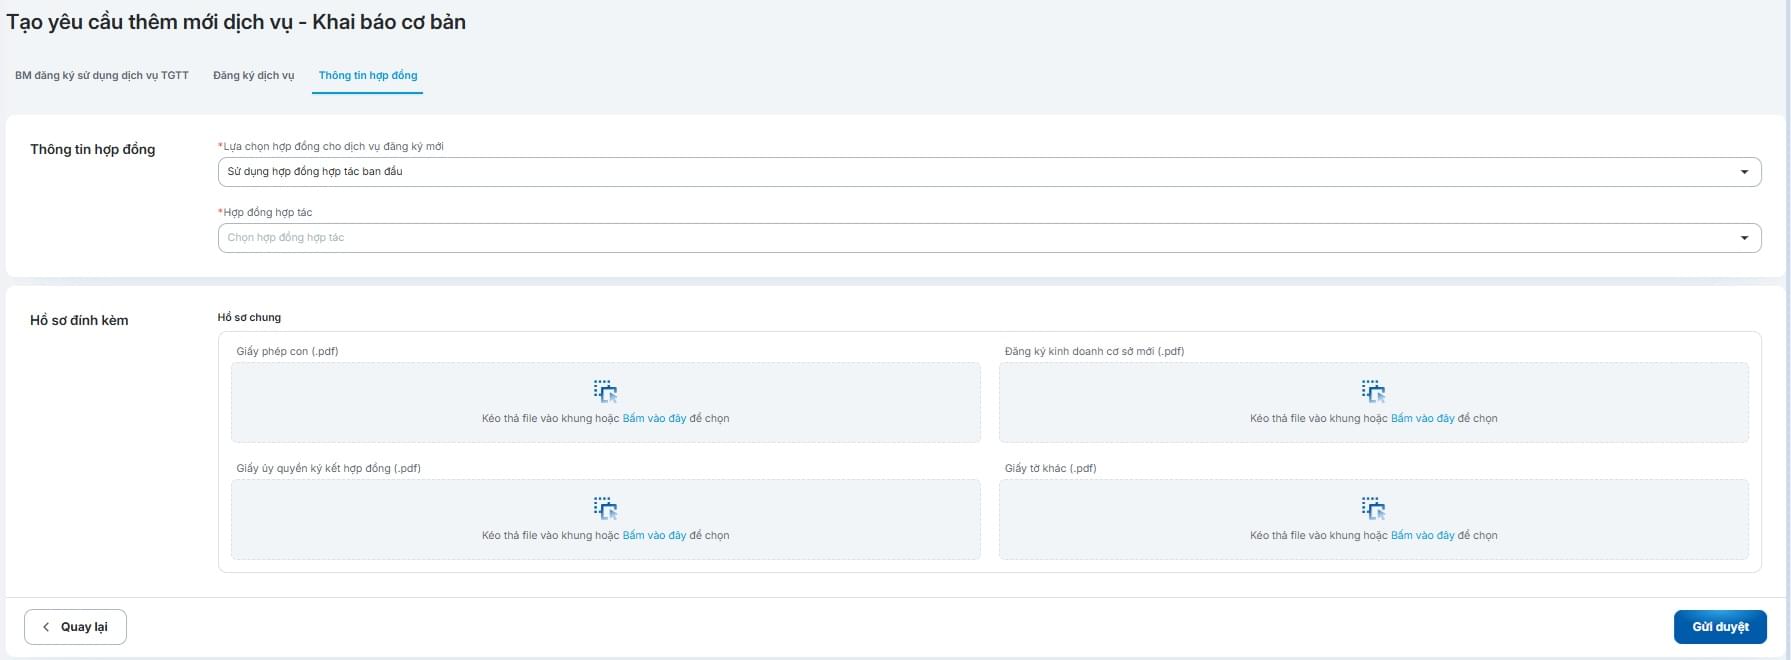
Click "Submit for Approval" to complete adding the new service and send the application for review.
After searching the application information and finding the merchant with Active status, select "Add New Terminal" in the action column.

Enter/select the required fields in the tabs:
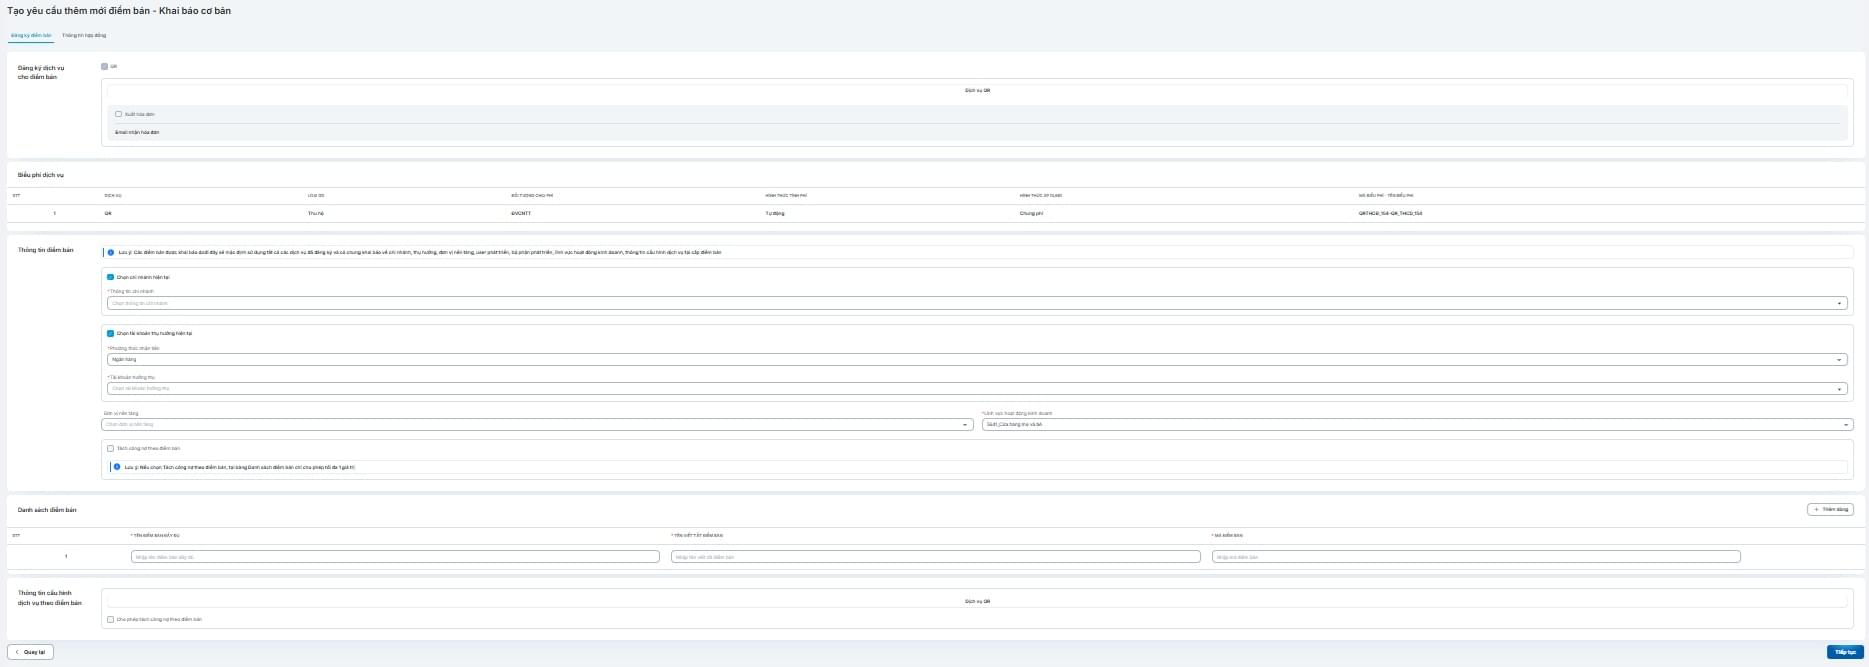

Click "Submit for Approval" to complete adding the new terminal and send the application for review.
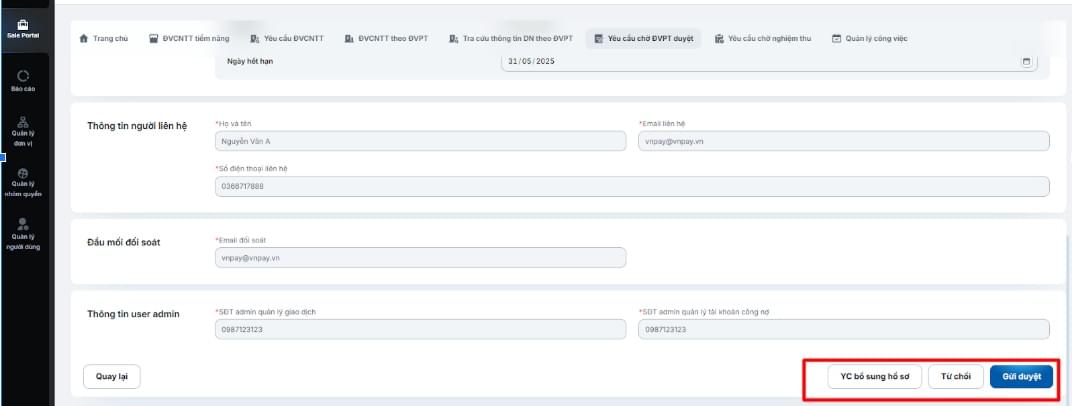
Select "Requests Pending Partner Approval" from the menu bar.
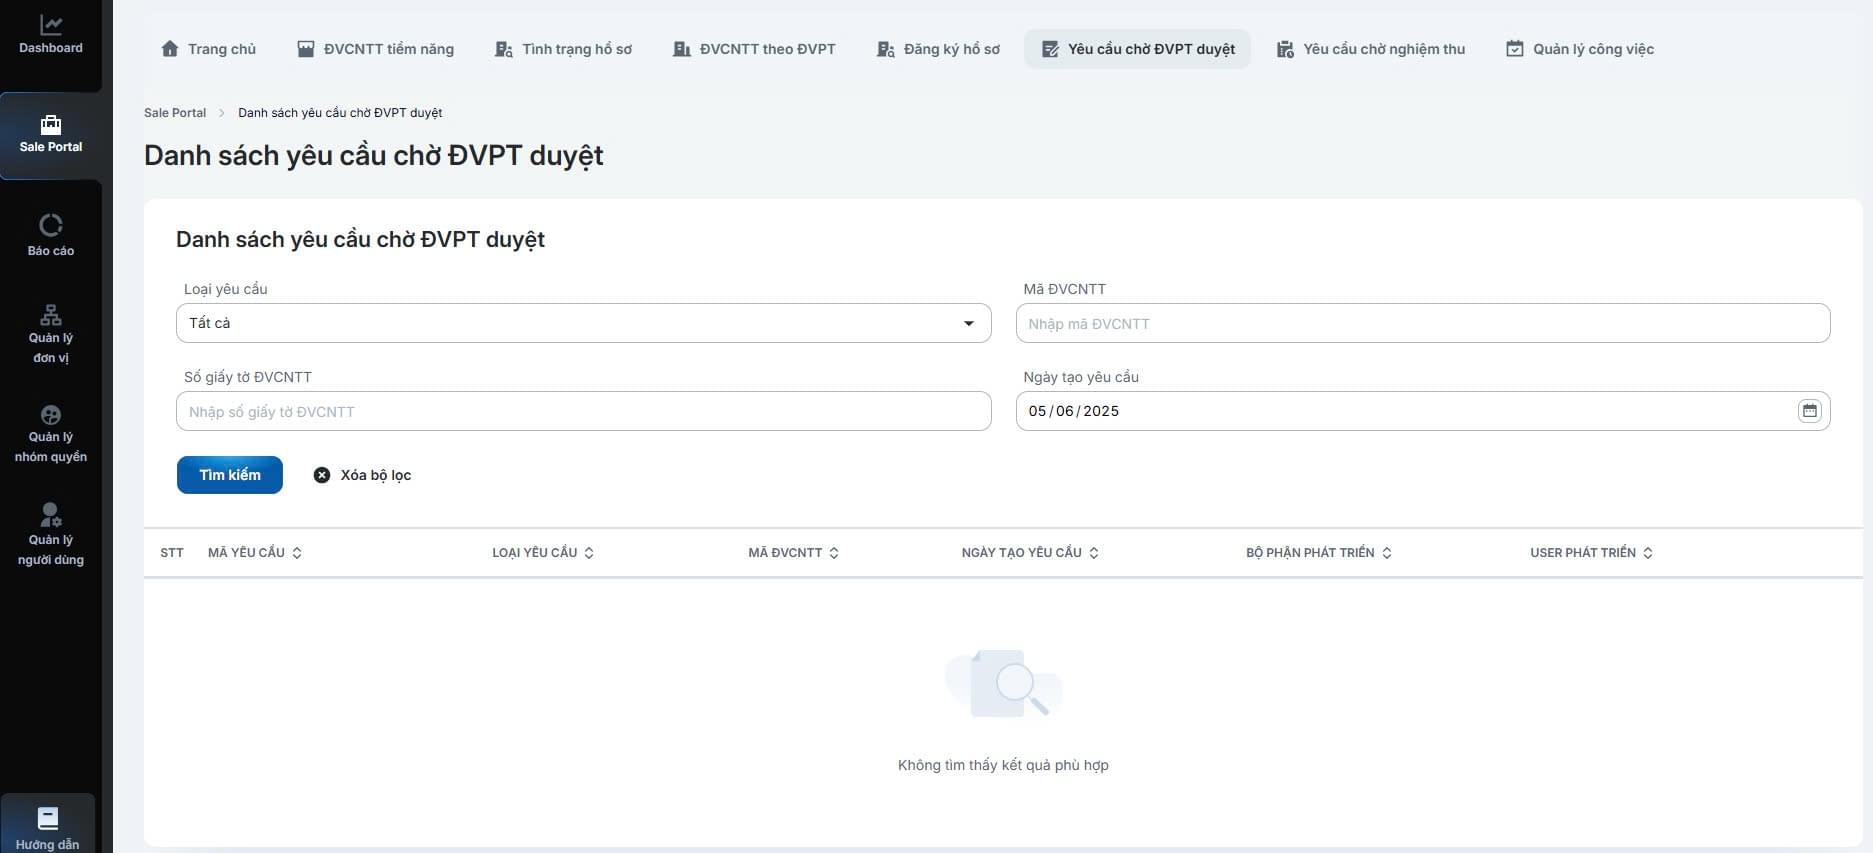
Enter the search criteria and click [Search].
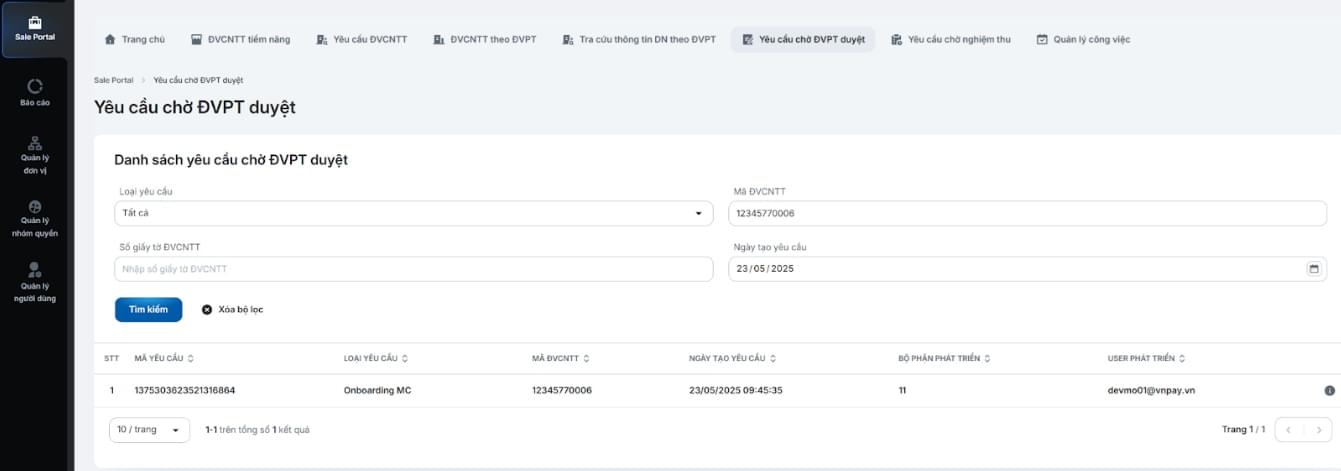
Click the icon to view details of the request pending partner approval
Review the information and:
Select "Requests Pending Acceptance" from the menu bar.
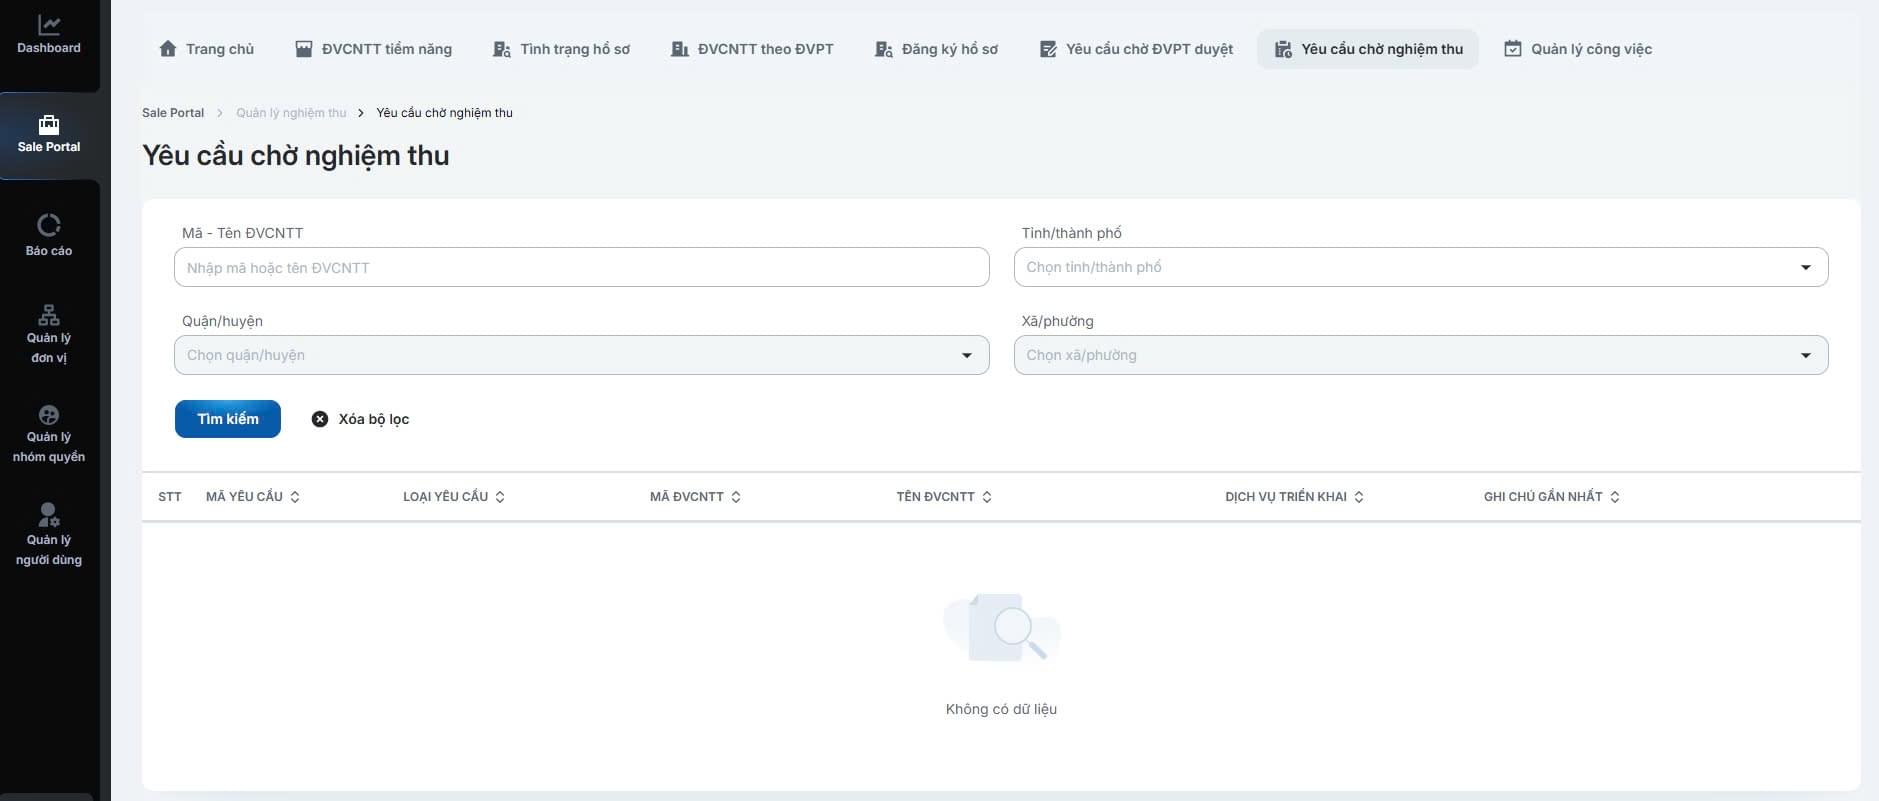
Enter the search criteria and click [Search].

Click the upload icon to upload the acceptance application.
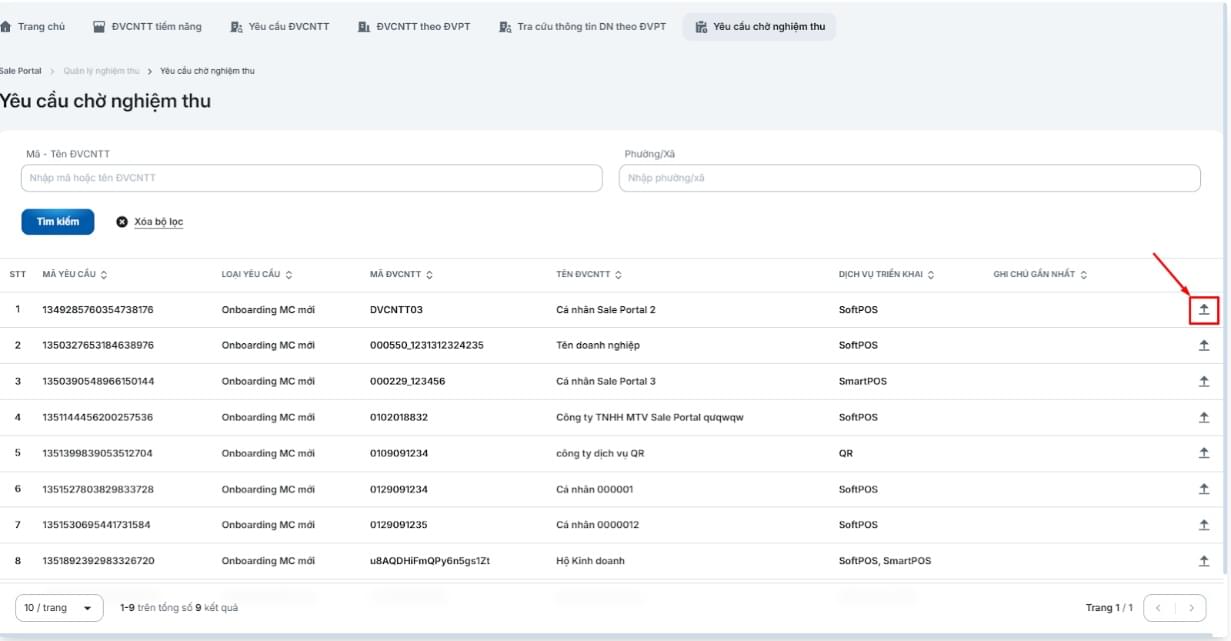
Upload the acceptance application for the request:
After uploading the acceptance application:
Select "Task Management" on the menu bar.

Enter/select the search criteria and click [Search].
After completing the search, select the icon at the task with status "Pending Processing".
Proceed to supplement the application and click "Submit for approval" to resubmit the application for review.